PSoC Creator 4.0 - Now Supporting FM0+ MCUs
Over the past few weeks I have been talking about the new features in PSoC Creator 4.0 and now, at last, it is time to spend some time on my favorite - support for flexible microcontrollers (FM0+ devices)!
[re-printed from PSoC Creator News and Information]
|
Over the past few weeks I have been talking about the new features in PSoC Creator 4.0 and now, at last, it is time to spend some time on my favorite - support for flexible microcontrollers (FM0+ devices)! FM0+ is a portfolio of microcontrollers designed for ultra-low-power and cost-sensitive applications such as white goods, sensors, meters, HMI systems, power tools and Internet of Things (IoT) battery-powered or wearable devices. Application development is supported by the Peripheral Driver Library (v2.1.0), which includes C language source code for the on-chip peripherals, and any of the popular software IDES, such as ARM MDK, IAR Embedded Workbench, iSYSTEM WinIDEA and Eclipse. We have now added PSoC Creator to that list. If you are a long-time microcontroller user you probably already have a favorite IDE and we don’t want to make you change the habits of a lifetime. So, while you can use PSoC Creator as a complete development environment, just like you would with PSoC, it also works as a convenient project setup tool. It is really easy, for example, to start a project in PSoC Creator, add and configure your peripherals, build the project to generate the supporting firmware, and then switch over to one of the supported IDEs to write the application code. That's the real benefit of PSoC Creator - it helps you through the process of initializing the peripherals and making pin connections. The secret to this is what we call "pins-in" design. To use a peripheral, say a UART, in a traditional microcontroller you have to pick the block (there are typically a number of them to choose from) and live with the pins that it is connected to. It's backwards! You should be able to pick the pin that suits your board and have a software tool figure out the right block to use. Without the pins-in approach you have to constantly refer to the device manual to figure out how to get a peripheral working on a given pin. As you add functionality to the design the problem of finding a pin solution just gets harder and harder. To reverse this approach we use the peripheral firmware generation and guided pin selection features of PSoC Creator. |
|
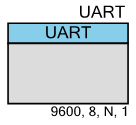 |
FM0+ peripherals are supported in PSoC Creator with components. To enable a function you simply drag the component into the schematic. Double-clicking on the component instance pops up the customizer dialog that lets you choose values for the peripheral parameters. It's hard to make mistakes when you use this interface because the choices are validated by the component or constrained to only present legal values. |
 |
|
|
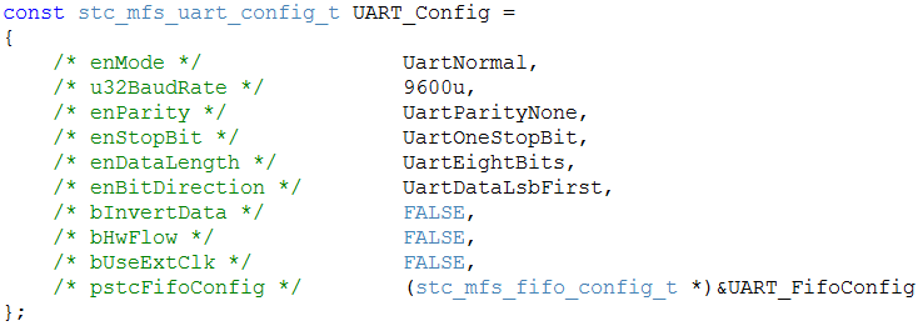
When you configure the component in this way and build the application, two useful things happen. First of all the driver module for the UART (strictly it is a multi-functional serial (MFS) block) is pulled into the project so you do not need to go find the source code, set the header file include path, and all those headaches. Secondly, PSoC Creator generates some supporting firmware for the peripheral. There are macros to identify the MFS block used and to make the pin connections (more on this later). Most importantly, it generates a configuration data structure for the peripheral. In this code snippet you can see how the selections from the dialog are used to populate the struct. The firmware is always neatly documented and you cannot get the struct member initialization wrong. |
|
 |
|
|
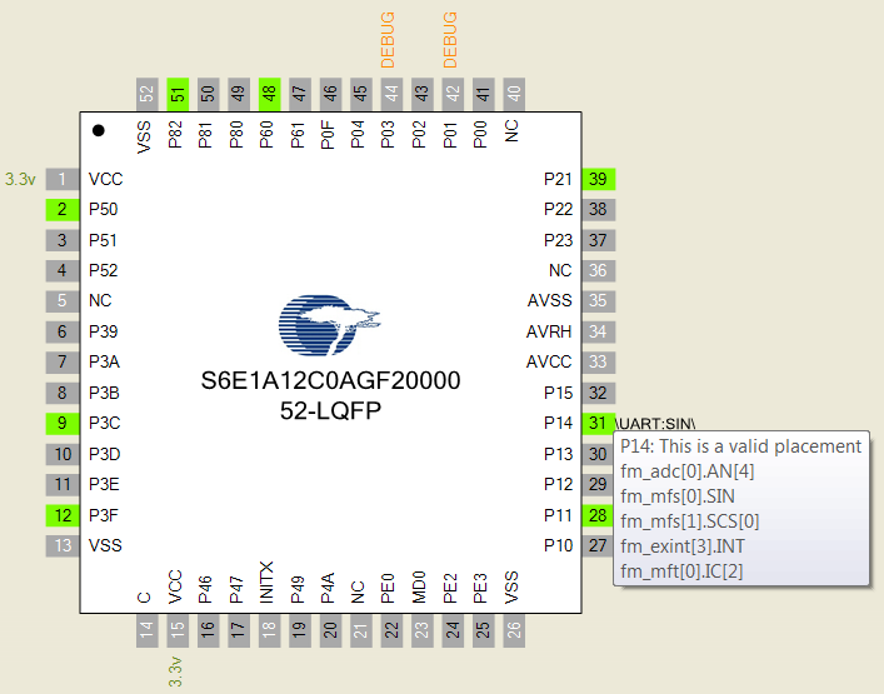
The next step is to choose the pins and the design-wide resources (CYDWR) editor makes this really simple. The editor presents all the pins and you just drag them onto the pin you want (or use a drop-down menu). The legal choices are shown in green and the tool will not let you pick an inaccessible pin. In this picture I have chosen pin 31 (aka port 3 pin 1) for the Rx pin (MFS block input). |
|
 |
|
|
A UART has two pins and so, as soon as one choice is made, the tool determines which MFS block to use (in this case it is block 0) and filters the available choices for the other pin. In this device the output from MFS block 0 only goes to pin 32 (port 3 pin 2) so only that pin is shown in green. |
|
 |
|
|
That is all you need to do to set up the peripheral. It is time to write your application. This is made simpler than usual because all the initialization code is generated by the tool. The PDL drivers have _Init() functions, in this case Mfs_Uart_Init(), which require a pointer to the MFS block and the configuration data. Both of these are generated and so the first line of C code is obvious. Note how the code would not change if you used a different MFS block - the generated code defines "UART_HW" to be MFS block 0 (UART0) so you do not have to care which actual block is used. The pin routing macros - "SetPinFunc" - are also generated by PSoC Creator and are independent of the actual pin address. Need to move the UART to new pins? Simply change the choices in the CYDWR editor and rebuild your application. There is no need to change a single line of C code. |
|
 |
|
|
Using PSoC Creator to set up FM0+ peripherals is really convenient. As I mentioned above, you can easily use the tool just as a firmware generator and do the bulk of your application development in your preferred IDE. All you need to do is create a project in the IDE, add the source files generated by PSoC Creator, point to the linker script file, set the include path, and you are ready to go. If you make modifications to the design in PSoC Creator they are immediately reflected in the IDE. If add or remove components then you just need to add or remove the driver and generated firmware files from the IDE project. I am really proud of our FM0+ integration into PSoC Creator. It's a great example of reusing technology that we developed for PSoC devices to eliminate some of the real difficulties associated with MCU-based development. We wrote thorough and well-documented Code Examples for just about every peripheral supported by the PDL and so I encourage you all to download PSoC Creator 4.0 and try out some FM0+ designs today. |
|

Re-use is only permitted for informational and non-commerical or personal use only.
